How to Enable DNS Privacy on Windows 11: A Step-by-Step Guide
Introduction
Securing your internet traffic goes beyond using a VPN or firewall. One often overlooked layer is DNS (Domain Name System) privacy. By default, Windows 11 sends DNS queries in plaintext, meaning anyone on your network—or your ISP—can see which websites you visit. Enabling encrypted DNS (such as DNS over HTTPS or DNS over TLS) encrypts those requests, blocking eavesdropping and tampering. This guide walks you through enabling this essential privacy feature in Windows 11, with clear, numbered steps.
What You Need
- A computer running Windows 11 (any edition).
- Administrator access to change network settings.
- An active internet connection (Wi-Fi or Ethernet).
- (Optional) The IP addresses of a trusted DNS provider that supports encryption, e.g., Cloudflare (1.1.1.1) or Google (8.8.8.8).
Step-by-Step Instructions
Step 1: Open Windows Settings
Press Win + I on your keyboard to launch the Settings app. Alternatively, click the Start button and select the gear icon.
Step 2: Navigate to Network & Internet
In the Settings sidebar, click Network & Internet. This section manages all your network connections.
Step 3: Select Your Active Connection
Depending on how you connect, click either Wi-Fi or Ethernet. Then click on the name of your active network (e.g., your Wi-Fi SSID or “Ethernet”). This opens the network properties page.
Step 4: Locate DNS Server Assignment
Scroll down the properties page until you see DNS server assignment. It will likely show “Automatic (DHCP)”. Click the Edit button next to it.
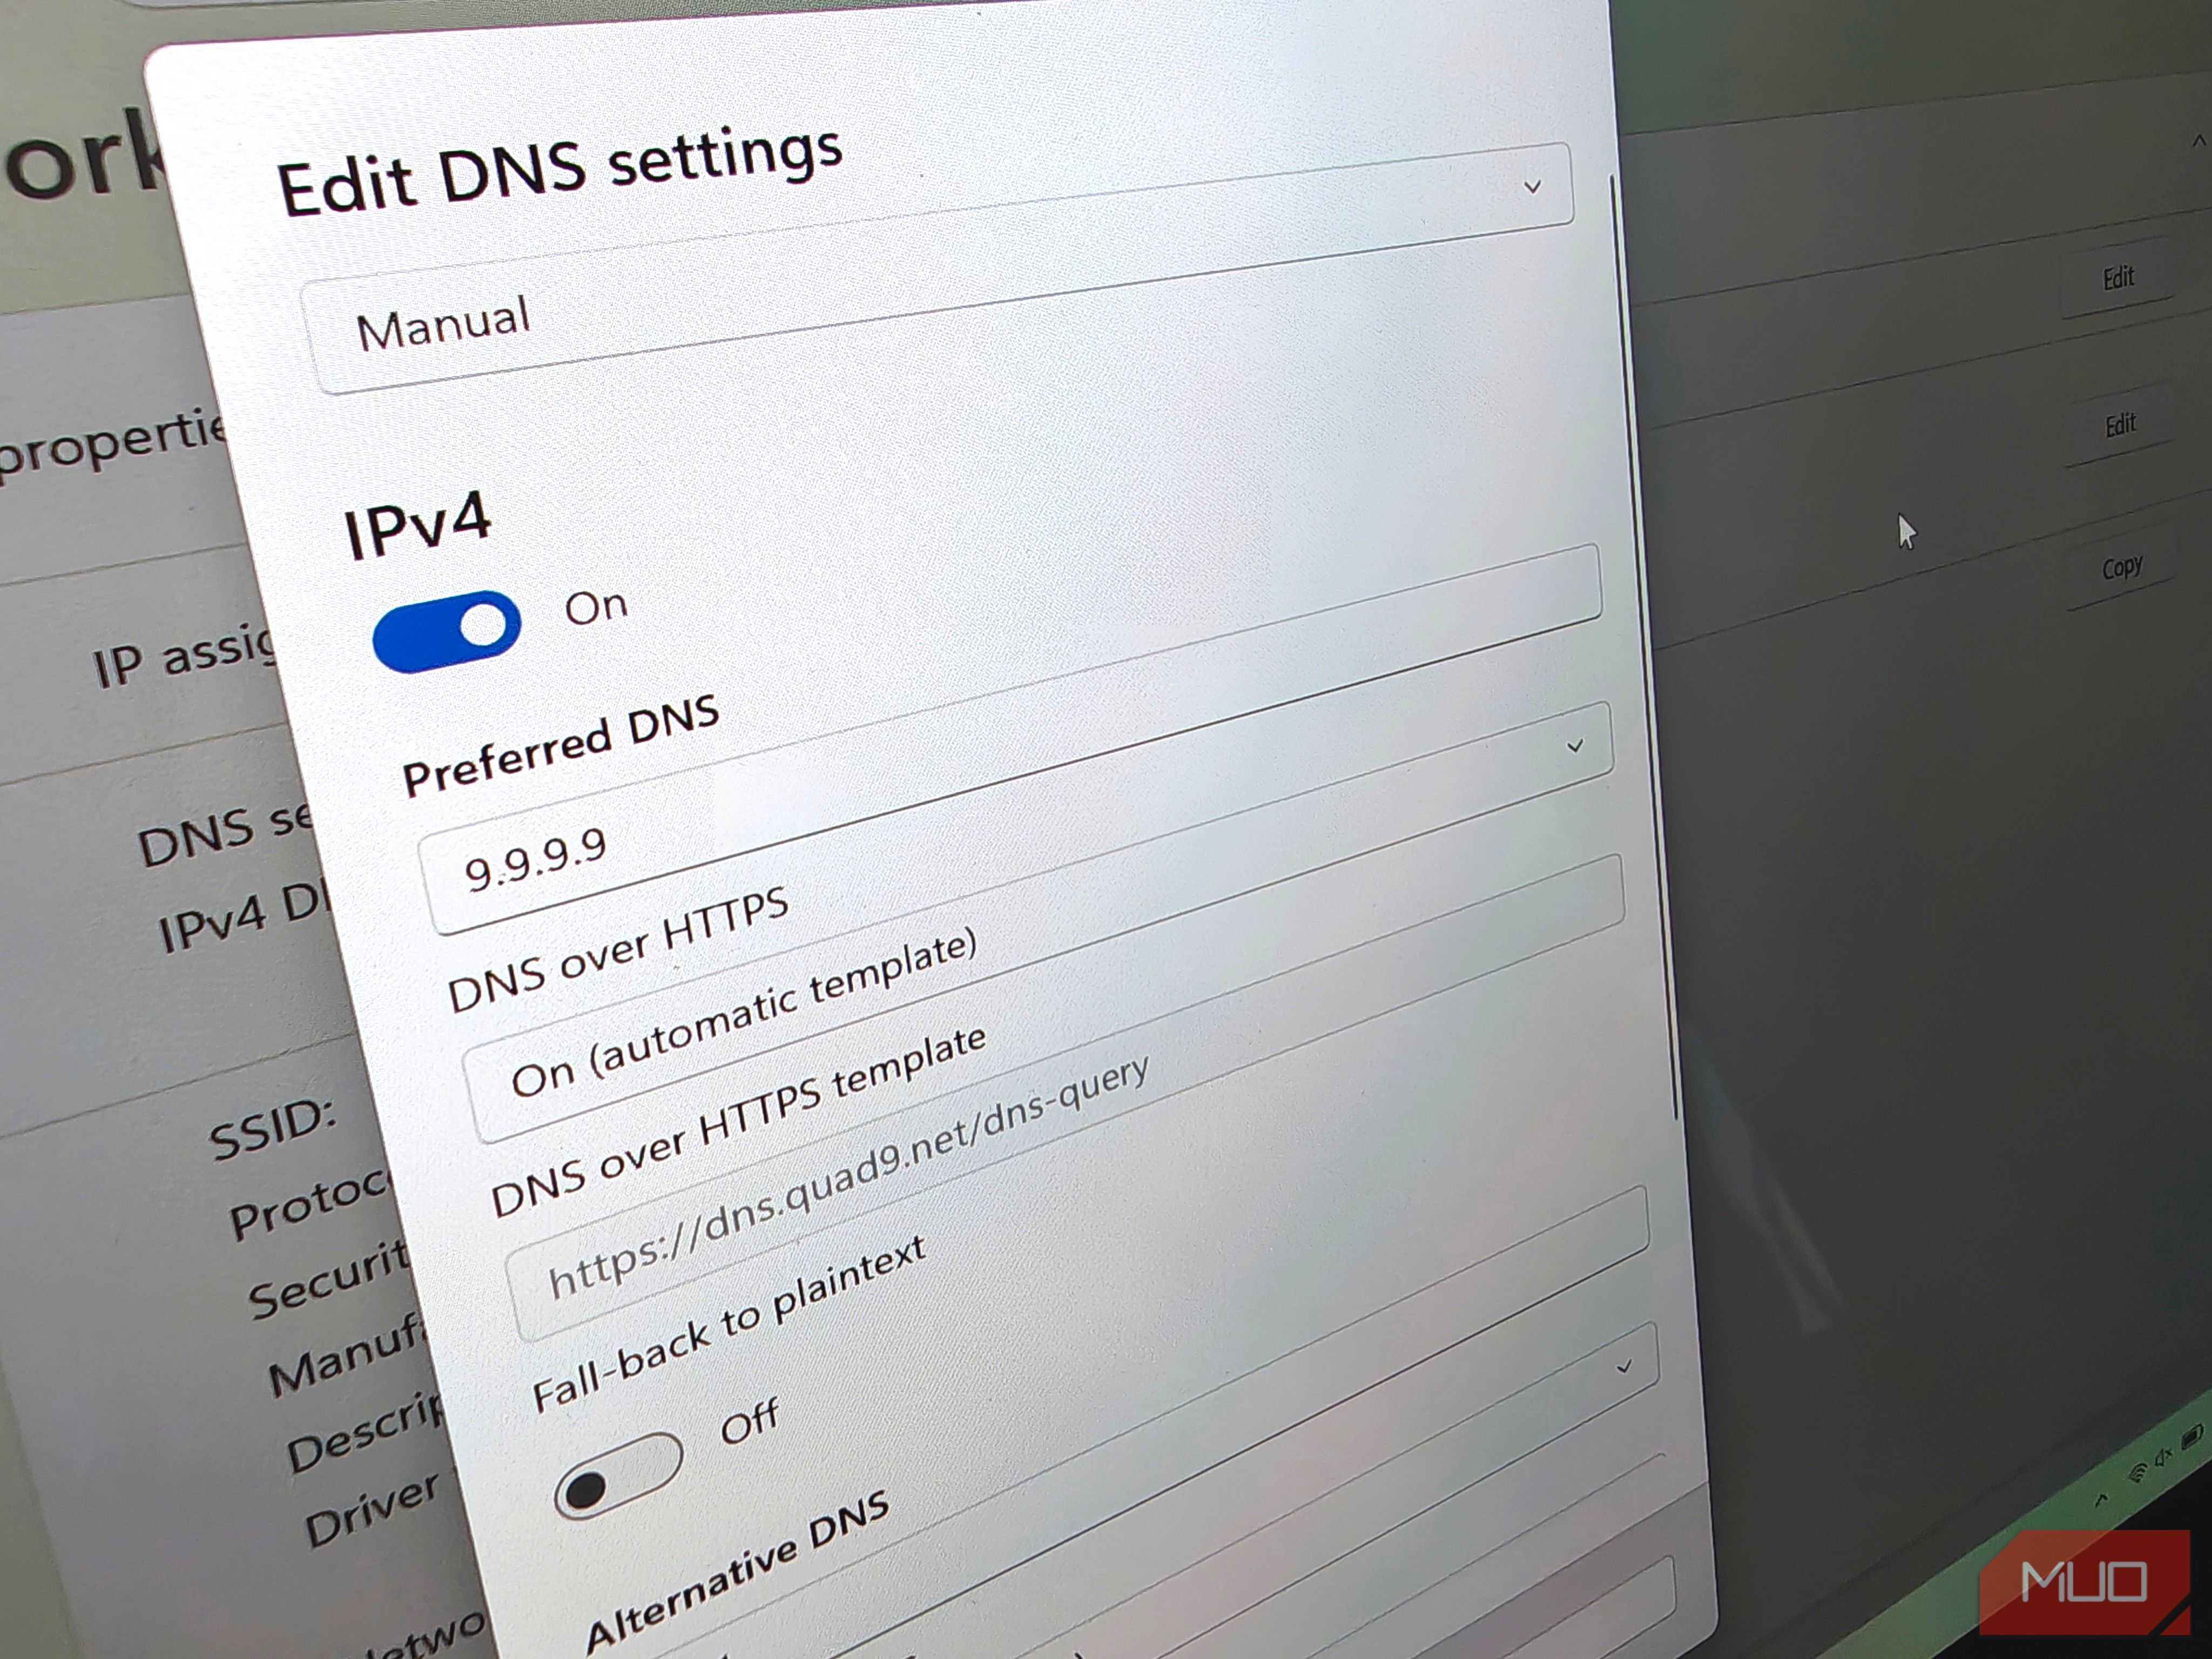
Step 5: Switch to Manual DNS and Enable Encryption
In the Edit DNS settings window:
- Change the dropdown from Automatic (DHCP) to Manual.
- Toggle IPv4 (or IPv6 if needed) to On.
- In the Preferred DNS field, enter the IP address of your chosen DNS provider (e.g.,
1.1.1.1for Cloudflare). - Below that, you’ll see a dropdown titled Preferred DNS encryption. Select Encrypted only (DNS over HTTPS) for maximum security. If you’re unsure about compatibility, choose Encrypted preferred, unencrypted allowed.
- Optionally, enter an Alternate DNS address (e.g.,
1.0.0.1) with the same encryption setting.
Step 6: Save and Apply Changes
Click Save at the bottom of the window. Windows 11 will immediately apply the new DNS settings. Your DNS queries are now encrypted.
Step 7: Verify Encryption Is Working
To confirm that encrypted DNS is active, visit a testing site like Cloudflare’s help page or use the Get-NetAdapterBinding PowerShell command. You should see a checkmark or confirmation that DNS over HTTPS is enabled.
Tips for Success
- Choose a reputable DNS provider: Cloudflare, Google, Quad9, and OpenDNS all support encrypted DNS and respect privacy. Avoid unknown or untrusted servers.
- Test with multiple networks: Some public Wi-Fi or corporate networks may block encrypted DNS. If you lose internet access, switch back to “Unencrypted only” or choose “Encrypted preferred, unencrypted allowed”.
- Set both IPv4 and IPv6: If your connection uses IPv6, repeat the process for IPv6 with appropriate addresses (e.g., 2606:4700:4700::1111 for Cloudflare).
- Check for group policies: Administrators can enforce encrypted DNS across multiple machines using Group Policy or MDM tools.
- Combine with other privacy tools: Encrypted DNS is a great start, but pair it with a reputable VPN or ad-blocker for comprehensive protection.