How to Capture a Rocket Launch from Orbit: A Satellite Photographer's Guide
Introduction
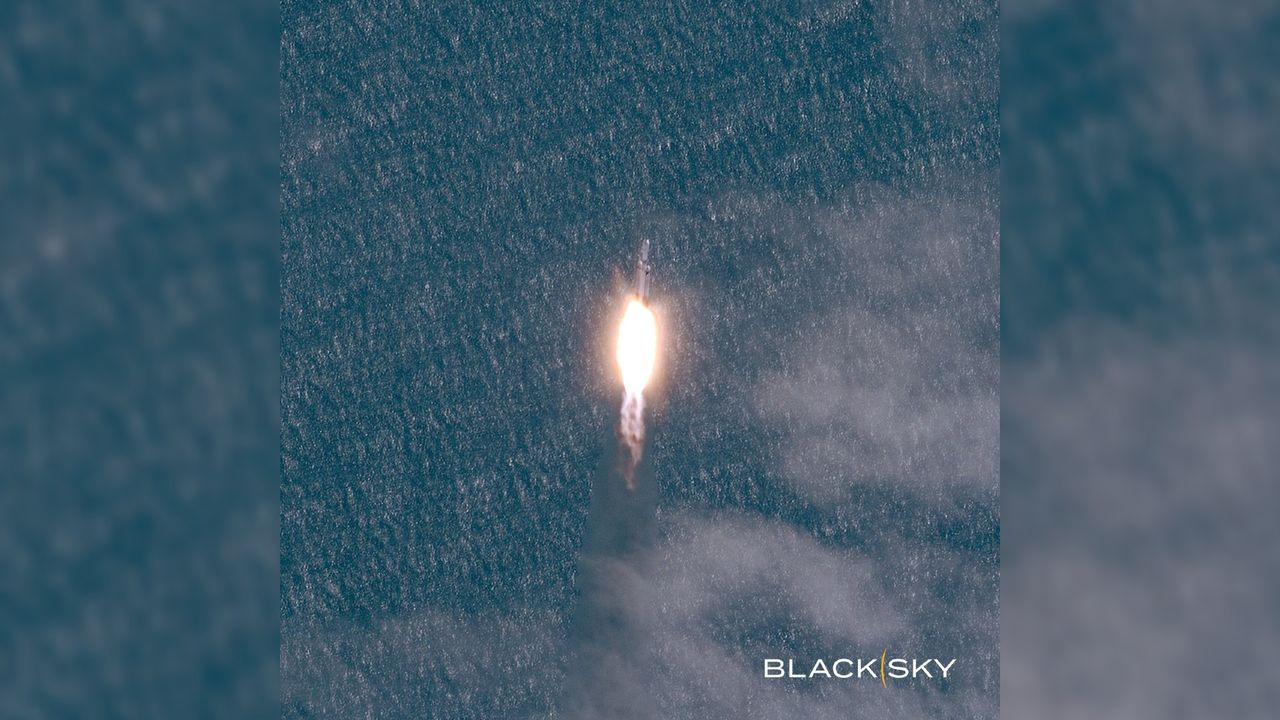
On April 29, SpaceX's Falcon Heavy rocket roared to life for the first time in 18 months, and a sharp-eyed satellite orbiting Earth captured the moment in stunning detail. These wild satellite photos offer a unique perspective—showing the launch from space itself. But how do you get such images? Whether you're a space enthusiast, a satellite operator, or a budding astrophotographer, this step-by-step guide will walk you through the process of photographing a rocket launch from orbit. From choosing the right hardware to processing the final shot, you'll learn the essential techniques used to snap those breathtaking, bird's-eye views of liftoff.
What You Need
Before you begin, gather the following materials and prerequisites. These are the building blocks for any successful satellite-based rocket launch photography mission.
- A satellite with a high-resolution optical camera – Think Earth-observation platforms like Planet Labs' Doves or Maxar's WorldView satellites. The camera must be capable of rapid shutter speeds and have a pointing accuracy of at least 0.1 degrees.
- Orbital tracking software – Tools like STK (Systems Tool Kit) or open-source alternatives such as GMAT to calculate passes and pointing angles.
- Launch manifest and timing data – Include the exact launch window (date, time, and trajectory) from sources like SpaceX's press kit or the FAA's launch database.
- Command and control interface – A secure ground station link to send commands to the satellite, including camera triggers and attitude adjustments.
- Image processing suite – Software such as Photoshop, GIMP, or specialized remote sensing tools (e.g., ENVI) for sharpening, color correction, and merging multiple frames.
- Knowledge of orbital mechanics – At minimum, understand concepts like right ascension, inclination, and node crossing to align your satellite's orbit with the launch path.
Step-by-Step Guide
Step 1: Choose the Right Satellite Platform
Not every satellite is built for rocket photography. You'll need a platform that can point and shoot with high agility. Look for satellites in low Earth orbit (LEO) with gimballed cameras or the ability to slew quickly. For example, the satellite that captured the Falcon Heavy launch was likely a small, agile CubeSat or a commercial imaging satellite with a push-broom scanner. Verify that your satellite's camera has a fast enough shutter to freeze the rocket's motion—typically 1/500 of a second or faster—and a resolution capable of resolving the rocket's shape (a few meters per pixel is ideal).
Step 2: Calculate the Orbital Pass Timing
Timing is everything. The launch window for Falcon Heavy was known in advance: April 29, 2023. You must compute when your satellite will pass directly over or near the launch site (e.g., Kennedy Space Center LC-39A) during that window. Use orbital propagation software to predict the satellite's ground track. Key inputs include the satellite's orbital elements (TLEs) and the launch time. Adjust for the rocket's ascent trajectory—it won't stay vertical for long. You want the satellite to be within a few hundred kilometers of the launch site at the moment of liftoff, ideally with the solar angle behind you to illuminate the exhaust plume.
Step 3: Program the Camera for the Launch Window
Once you have the exact pass time (down to the second), upload a command sequence to the satellite. This should include:
- Attitude maneuver – Point the camera toward the predicted location of the rocket at liftoff. For Falcon Heavy, that's roughly 28.5°N latitude, 80.6°W longitude, but the rocket will climb eastward quickly.
- Shutter interval – Set a burst mode capturing one image every 0.5 to 1 second for the first 10–15 seconds of flight. This ensures you catch the moment of Max Q and stage separation.
- Focus and exposure – Pre-set focus to infinity and exposure to manual (e.g., ISO 200, aperture f/8, shutter 1/1000 s) to avoid automatic adjustments that could miss the fast-moving target.
Test the sequence with a simulation on the ground. Real satellites, like the one that captured the wild satellite photos, often have to upload commands hours in advance due to communication delays.

Step 4: Acquire and Process the Images
After the launch, download the raw images from the satellite. You'll likely get a series of frames showing the rocket's trail as a bright line against the dark Earth. Processing steps include:
- Stack multiple images – Align and combine several frames to reduce noise and enhance the rocket's trail. Use software like DeepSkyStacker or manual layers in Photoshop.
- Sharpen and contrast – Apply a high-pass filter to bring out the details of the exhaust plume and the rocket's silhouette. Increase contrast to make the flame stand out.
- Georeference – Overlay a map grid to show the exact location of the launch site. This adds context and makes the image scientifically useful.
- Color correct – Adjust white balance if needed; rocket exhaust appears orange/white in daylight.
The final image should look as dramatic as the Falcon Heavy launch photos shared online—bright, sharp, and clearly showing the rocket ascending through the atmosphere.
Step 5: Share and Analyze
With your processed image in hand, share it with the community. Upload to platforms like Twitter, Reddit's r/space, or professional networks. Add metadata such as time, satellite name, and camera settings. For deeper analysis, compare your image with telemetry data from the launch provider: you can verify the rocket's altitude, speed, and even identify stage separation. The satellite that caught the Falcon Heavy launch provided valuable data for engineers and enthusiasts alike.
Tips for Success
Follow these expert pointers to improve your chances of capturing that perfect shot:
- Watch the weather – Cloud cover can block the view from space. Use satellite cloud cover forecasts to pick clear passes.
- Practice with smaller rockets – Start with sounding rockets or CubeSat launches before attempting a Falcon Heavy. The skills are the same, but the stakes are lower.
- Coordinate with other satellite operators – Multiple satellites can cover different angles, creating a stereo 3D view of the launch.
- Respect orbital restrictions – Avoid imaging protected areas or interfering with other payloads. Always follow space traffic laws.
- Stay up-to-date – Launch schedules change. Monitor SpaceX's social media and the FAA's NOTAMs for real-time updates.
With these steps and tips, you're ready to try your hand at satellite rocket photography. Who knows? Your next shot might be the one that trends worldwide—just like those incredible Falcon Heavy images from orbit.